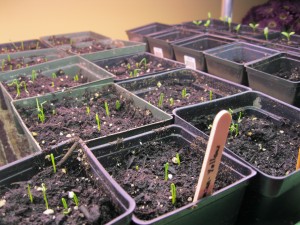
Many gardeners choose to start their own seeds instead of buying transplants from a nursery. Some do it for cost-savings, others for a wider variety of plants, and still others to control the environment and soil the plants are grown in. We do it for all of these reasons…plus it’s kind of fun. I love watching the little sprouts push their way up through the soil, and going back a few hours later to see that they’re almost an inch long!
But starting your own seeds can also be frustrating at times, like last year when several of my transplants (including my precious tomatoes!) didn’t make it. Or when the dog ran through them as they were set outside to “harden”, and upturned entire flats of seedlings. But, alas, we’re trying again! And because of my difficulties in previous years, I’ve done a lot of research on seed starting. I want to get it right this time! Here are a few tips I’ve come across. They may seem obvious, but hopefully they’ll help our little seedlings thrive and grow into healthy plants for the garden!
1. Start with a sterile soil mix. I’ve read that you can do this by “baking” a mixture of your own soil and compost. But we opted to purchase an organic mix to start our seeds in. The idea is that you don’t want your fragile seedlings competing with weeds from the start of their life. Give them the best chance to succeed!
2. Don’t over water! I make this mistake every year. I am so worried that the plants will dry up and die that I water them way too much. I’m being very careful this year to give them just enough, even if it means that I have to water them in smaller amounts more frequently.
3. Heat and light matter. Last year we used our only window that got enough sun, which happens to be in our bedroom. We just set flats on a table and let nature do the work. This year we’re not taking any chances on our seedlings getting enough heat or sun. Some wonderful friends gifted us with two large racks with lighting for seed starting (on the condition that we start their flower seeds…no problem!). We’ve got it all set up, and it’s working beautifully!
4. Timing also matters. If you start your seeds too late, the plants may be too weak when transplanting time comes (part of my problem last year). However, if you start too early, they can become root bound. To combat this problem, I researched the right times for starting each plant based on our last average frost date and made myself a weekly schedule, then sorted my seeds accordingly.
I know there is a lot more to seed starting than can fit in a single post, so what are your tips? What have you found helpful?

Pingback: Seedling Update « A Hopeful Homestead
Hi! I actually don’t start with sterile soil: I use garden soil, mixed with compost and a little organic fertilizer. A few of the weaker seedlings sometimes die this way, but that just ensures that the ones that live are those in the most robust health! (If I put three seeds to a pot, I don’t have any problem.) Also, I don’t water my seeds until they’ve sprouted. I guess this might not work with storebought potting mix, because it might not be wet enough, but garden soil is already at a good humidity for sprouting seeds, so I just put them in and then cover the whole thing with plastic to keep the moisture in until the plants appear. I get a much better germination rate than with soil that’s been soaked after planting. Anyway, those are my tips. Best of luck for this growing season!